Release Notes with reno
“What features merged since the last release?” – “Did we introduce something which might break a deployment?” – “Let me grep through the commit history to check what happened.” Remember sentences like these when you’re about to release? If you like this fire-fighting mode, ignore this post. If you want to have a more relaxed release, this post will show you how to use a tool called reno to manage your release notes.
| Date | Change description |
|---|---|
| 2017-12-22 | The first release |
TL;DR
Below is the shortest end-to-end example I can think of. The steps are:
- Install the needed software
- Create a git repository
- Create a release note with reno
- Commit the release note to the repo
- Create a report out of all committed release notes
I trimmed some of the unnecessary output with [...]:
1 2 3 4 5 6 7 8 9 10 11 12 13 14 15 16 17 18 19 20 21 22 23 24 25 26 27 28 29 30 31 32 33 34 35 36 37 38 39 40 41 42 43 44 45 46 47 48 49 50 51 52 | $ apt-get install -y git # reno operates on git repos
$ git init # initialize a git repo
$ git config user.name "John Doe" # configure git repo (1/2)
$ git config user.email "jd@example.com" # configure git repo (2/2)
$ apt-get install -y python-pip # we will install reno with pip
$ pip install reno # install reno from PyPi
$ reno new my-first-release-note # create a release note
Created new notes file in releasenotes/notes/my-first-release-note-21b284249cec129c.yaml
$ git add -A # Add the release note to the repo
$ git commit -m "Add my first release note" # commit the release note
$
$ reno list # list the release notes
scanning ./releasenotes/notes (branch=*current* earliest_version=None)
including entire branch history
21b284249cec129c: adding releasenotes/notes/my-first-release-note-21b284249cec129c.yaml from 0.0.0
0.0.0
releasenotes/notes/my-first-release-note-21b284249cec129c.yaml (01a57fb590b9145fbc6bd24bb924c8f62396bf22)
$
$ reno report # create a report
scanning ./releasenotes/notes (branch=*current* earliest_version=None)
including entire branch history
21b284249cec129c: adding releasenotes/notes/my-first-release-note-21b284249cec129c.yaml from 0.0.0
=============
Release Notes
=============
0.0.0
=====
Prelude
-------
.. releasenotes/notes/my-first-release-note-[...]
Replace this text with content [...]
New Features
------------
.. releasenotes/notes/my-first-release-note-[...]
- List new features here, or remove this section. [...]
Known Issues
------------
.. releasenotes/notes/my-first-release-note-[...]
- List known issues here, or remove this section. [...]
[...]
|
Things you notice from this example are:
- reno creates its release notes in a directory
releasenotesunder the root directory of your project. - A release note is a
YAMLfile which uses a combination of the name you provided and a hash-like text. This ensures uniqueness in file names. - The default template which our release note is based on used embedded restructured text for the markup of our prose.
- The report combines all of our release notes (only one so far) into something you can use in a release letter.
- The report also lists a version number (
0.0.0in this example) which can be influenced with git tagging.
The next sections will dive deeper into specific questions on how to use reno in your (most likely code driven) project.
Use Case
Release notes are a way to let your users know what happened since the last release. This can be:
- more awesome features
- some nasty bugs got fixed
- known issues which are not yet solved
- code changed which have an impact on the upgrade procedure
This is a non-exhaustive list. It depends on your users what you add. reno [1] is a tool to manage the release notes of your project. It got developed to fit the needs of the OpenStack upstream development, but it can be used in any other project as well and this post will demo a few of its capabilities.
The demo application and environment
This post contains an example application (called tsk-mgr) we
will use to demo the usage of reno in a more real-world
manner. tsk-mgr is a TODO list management tool with a CLI interface and
persistence by using the Python shelve library [2]. It
has a docs directory which uses Sphinx [3] as documentation
generator. The structure of the app got created with cookiecutter [4].
To reproduce the actions below on your local laptop, download the
project source files.
The environment is based on Vagrant [5]. After extracting
the archive, use the demo environment like this:
1 2 3 4 5 | [markus@local]$ vagrant up # see the Vagrantfile
[markus@local]$ vagrant ssh # login
vagrant@reno:~$ sudo su -
root@reno:~# cd /applications/tsk_mgr/ #
root@reno:/applications/tsk_mgr# 2>/dev/null 1>&2 python -m SimpleHTTPServer & # to serve the docs
|
Doing this in a virtual machine is entirely optional. You could also do it in a Python virtualenv, a Docker container, a chroot or your local laptop.
Install and use the app like this:
1 2 3 4 5 6 7 8 9 10 11 12 13 14 15 16 17 18 19 20 21 22 23 | $ python setup.py develop # install the app in development mode
$ [...]
$
$ tskmgr --help # call the app
Demo Tasks Mgmt.
Usage:
tskmgr create <title>
tskmgr list
tskmgr update <id> <attr=value>...
tskmgr (-h | --help)
tskmgr --version
Options:
-h --help Show this screen.
--version Show version.
$
$ tskmgr create "Write a post about reno"
created: 5e16bde4-b1f6-4c9b-a090-cec9573c0a89 | Write a post about reno
$
$ tskmgr list
Current tasks:
* Write a post about reno
|
We build the documentation with:
1 | $ make docs # alternatively: cd docs && make html
|
Under the covers, this uses the sphinx-build command from Sphinx,
but we won’t dive deeper into this. Further reading can be found at
[6].
Now you can access the documentation in your local browser via the
URL http://192.168.159.11:8000/docs/_build/html/index.html. The
IP address got specified in the Vagrantfile and the port 8000
is the default for SimpleHTTPServer [7].
If you don’t like to use it anymore, destroy the environment with
vagrant destroy -f and remove the directory. You’re laptop will
be clean like nothing happened.
How to add the reno report to my documentation
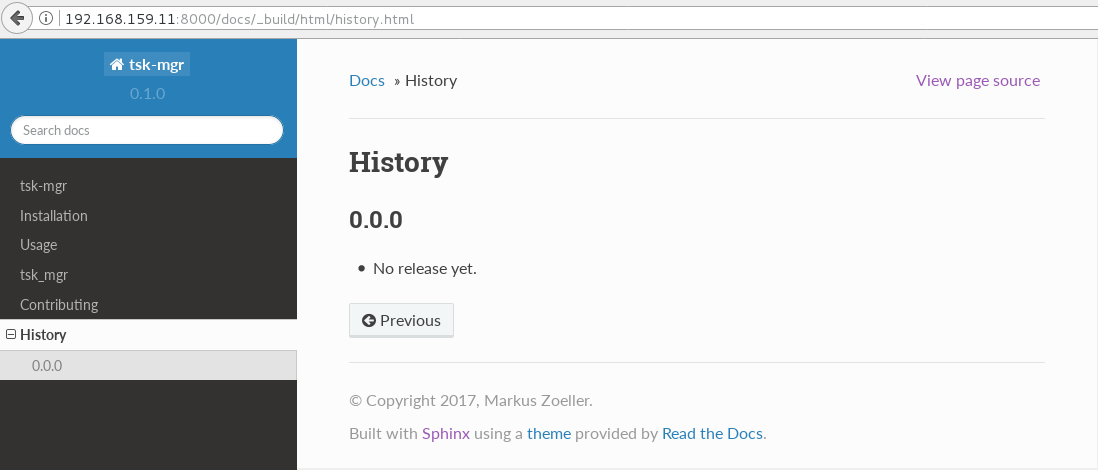
We will use the file docs/history.rst for our release notes. We start
with this view of the application release history:
We will use the reno Sphinx extension:
1 | $ pip install 'reno[sphinx]'
|
After that, we can add it to the Sphinx configuration file at
docs/conf.py. This diff shows the line to add to the extensions
list:
1 2 3 4 5 6 7 8 9 10 11 12 | diff --git a/docs/conf.py b/docs/conf.py
index c6d3e26..031653c 100755
--- a/docs/conf.py
+++ b/docs/conf.py
@@ -45,6 +45,7 @@ import tsk_mgr
extensions = [
'sphinx.ext.autodoc',
'sphinx.ext.viewcode',
+ 'reno.sphinxext',
]
# Add any paths that contain templates here, relative to this directory.
|
We will show the release notes in docs/history.rst. Use the
release-notes directive we gained from installing the reno Sphinx
extension:
1 | .. release-notes:: Release Notes
|
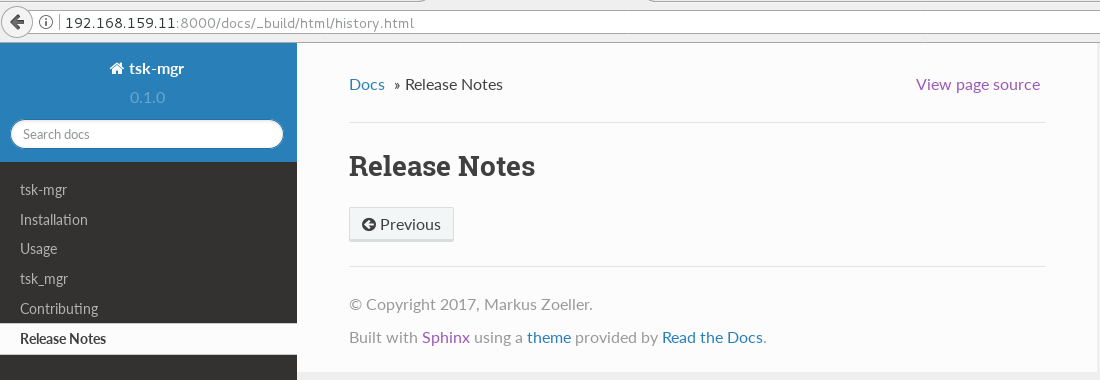
It’s empty for now, as we haven’t yet added a release note to this project.
Add a release note and show it in the docs
Let’s assume we want to release the app (to PypI for example) but we discovered that the update of tasks doesn’t work. Instead of delaying the release date, we create a release note which states this known issue:
1 2 | $ reno new ki-update-not-working
Created new notes file in releasenotes/notes/ki-update-not-working-8f89e1c561bc7c91.yaml
|
I used the prefix ki for known issue, but that’s entirely optional.
Edit the yaml file with your editor of choice so that you have this content:
1 2 3 4 5 | ---
issues:
- >
The update procedure doesn't work at the moment. This means that the
command ``tsk-mgr.py update`` throws an error.
|
Tip
The > char is YAML folding syntax. It replaces every line break
with a space. If you want to keep the line breaks as you specified them,
use the | char. More details at [8] or the official
spec [9].
Remember, reno works on your git repository. Add the release note and commit it:
1 2 | $ git add -A
$ git commit -m "Add known issue about update"
|
Build the docs again with make docs and refresh the history page:
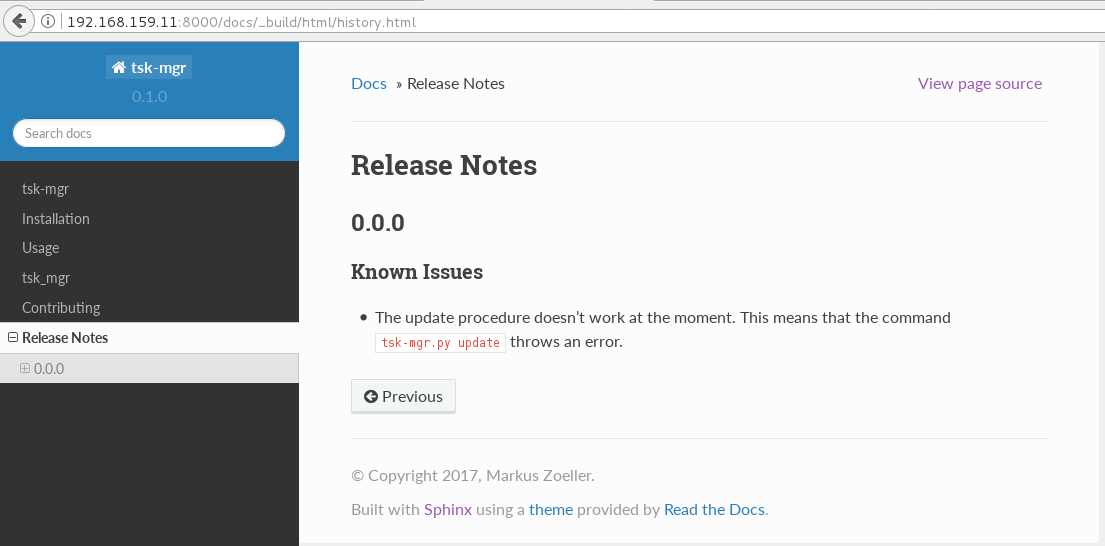
Here you see that the embedded restructured text in the YAML file can be interpreted and rendered by the reno Sphinx extension. This allows you to format the release notes for easier consumption for your users.
Add a release note with a code change
The examples before showed the usage of reno when no code was involved. We change this by doing an actual fix in the application.
Our app works fine in Python 2, but the shelve library behaves
differently in Python 3. We see this issue:
1 2 3 4 5 6 7 | $ python -V
Python 3.5.2
$
$ tskmgr list
Traceback (most recent call last):
[...]
dbm.error: db type could not be determined
|
We fix this in the code and add a release note for the users to notice. The git commit consists of two files:
- the changed functional code
- the release note for this
The diff looks like this:
1 2 3 4 5 6 7 8 9 10 11 12 13 14 15 16 17 18 19 20 21 22 23 | diff --git a/releasenotes/notes/bf-list-in-py3-a2ea5423b9d538f0.yaml b/releasenotes/notes/bf-list-in-py3-a2ea5423b9d538f0.yaml
new file mode 100644
index 0000000..8bf1bf5
--- /dev/null
+++ b/releasenotes/notes/bf-list-in-py3-a2ea5423b9d538f0.yaml
@@ -0,0 +1,5 @@
+---
+fixes:
+ - >
+ The command ``tskmgr list`` didn't work on Python3. This is fixed now.
+
diff --git a/tsk_mgr/tsk_mgr.py b/tsk_mgr/tsk_mgr.py
index 037840a..0f4bfa3 100755
--- a/tsk_mgr/tsk_mgr.py
+++ b/tsk_mgr/tsk_mgr.py
@@ -121,7 +121,7 @@ class Persistence(object):
def list_tasks(self):
db = shelve.open(Persistence.FILE_NAME, writeback=True)
- tasks = db.values()
+ tasks = [t for t in db.values()]
db.close()
return tasks
|
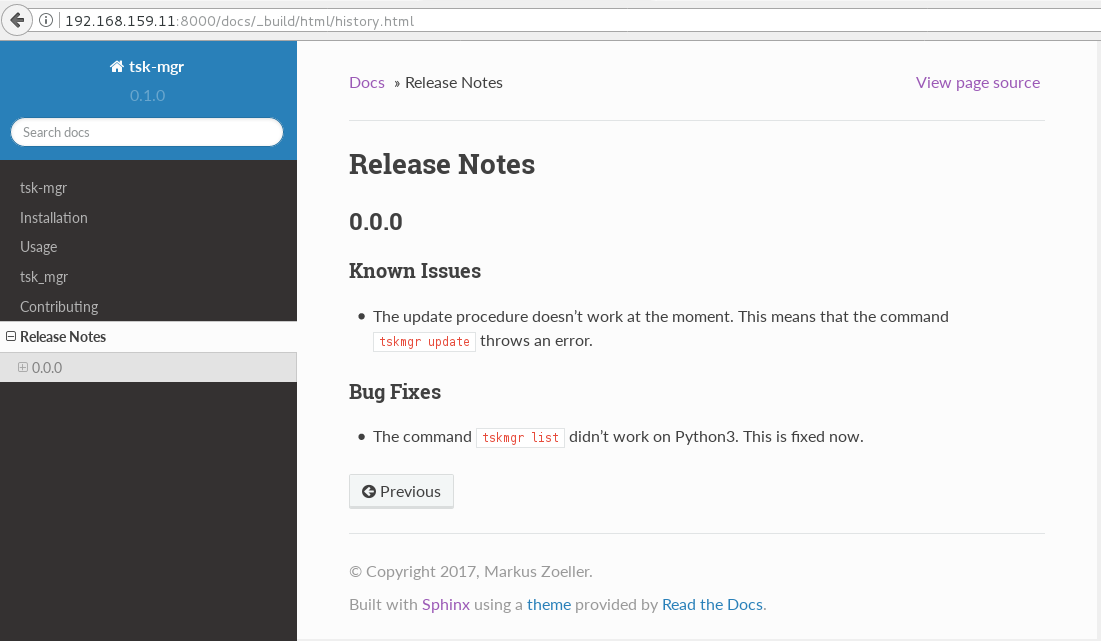
That’s the beauty of release note management with reno. The documentation is part of the very same code change.
The update documentation looks like this:
Release notes and versioning
You might have noticed that the versions were off in the screenshots.
While the docs used the version number from within the project,
reno took the version number from the git repository, namely the
latest tag in the current branch. As we didn’t yet tag the project,
reno used 0.0.0. We will change that by applying a git tag
and then list what reno has for this release:
1 2 3 4 5 6 7 8 | $ git tag 0.1.0
$ reno list --version 0.1.0
scanning ./releasenotes/notes (branch=*current* earliest_version=None)
including entire branch history
[...]
0.1.0
releasenotes/notes/bf-list-in-py3-[...]
releasenotes/notes/ki-update-not-working-[...]
|
Let’s add two more notes to see how this will be handled:
1 2 3 4 5 6 7 8 9 10 11 12 13 | $ reno new test
$ reno new another-test
$ git add -A
$ git commit -m "even more release notes"
$ reno list
scanning ./releasenotes/notes (branch=*current* earliest_version=None)
[...]
0.1.0-2
releasenotes/notes/another-test-[...]
releasenotes/notes/test-[...]
0.1.0
releasenotes/notes/bf-list-in-py3-[...]
releasenotes/notes/ki-update-now-working-[...]
|
For the unreleased release notes (here they are test and
another-test) reno simply uses the last git tag and adds a
counter for the number of release notes which will be released with
the next git tagging. After another version bump we see this:
1 2 3 4 5 6 7 8 9 10 | $ git tag 0.2.0
$ reno list
scanning ./releasenotes/notes (branch=*current* earliest_version=None)
[...]
0.2.0
releasenotes/notes/another-test-[...]
releasenotes/notes/test-[...]
0.1.0
releasenotes/notes/bf-list-in-py3-[...]
releasenotes/notes/ki-update-now-working-[...]
|
The Sphinx extension for reno can also filter for version numbers:
1 2 3 4 5 6 | ====================
Release Notes: 0.1.0
====================
.. release-notes:: 0.1.0 Release Notes
:version: 0.1.0
|
Tip
This is a good way to split up the display of the release notes over multiple files, if you’re concerned with showing too much at once.
Release notes and stable branches
If your project has a stable branch policy, you can limit the displayed release notes to that branch only with:
1 2 3 4 5 6 | =============================
Release Notes: <release-name>
=============================
.. release-notes::
:branch: stable/release-name
|
This means the command git branch --list should contain one branch named
stable/release-name. If your stable branch naming convention is
different, you have to create a reno config file and change the
option branch_name_re [10].
Important
Changes to release notes in a stable branch, like fixing a typo or phrasing something differently, need to be done in that stable branch. That’s due to how reno scans for release notes to keep track [10].
A real-live example, of how the usage of reno in a big project can look like, can be found at the OpenStack projects like Nova [11]. The OpenStack community is the origin on reno, which needed something to keep track with the many contributions by their many contributors.
Conclusion
This post showed how you can use reno to manage the release notes of your project. Among others, these benefits are the most useful:
- The release notes can be peer-reviewed like code. No more “We released a bunch of fixes”.
- The release note is part of the code change which makes the release note necessary. Write it while your memory of the impact is still fresh.
- Backports to stable branches already contain the release note. There’s no way to miss the notes.
- Merge conflicts to the overall release letter are next to impossible as every developer works in an extra file which gets combined later.
- Have a (customizable) template of release specific sections which are the most important ones for your users.
- A Sphinx document generator plugin is available. No copy & paste to another place necessary.
When OpenStack introduced the usage of reno, it became apparent that there was a little confusion about when a change needs a release note. Having a written guideline will help you to introduce reno for your project.
It also helps a lot if you know your users as you write for them. Operators are often concerned about deprecations and any upgrade impacting actions they need to do. At the end of the day, the release notes are a communication vehicle with your user base. Make the best out of it.
References
| [1] | https://docs.openstack.org/reno/latest/ |
| [2] | https://docs.python.org/2/library/shelve.html |
| [3] | http://www.sphinx-doc.org/en/stable/ |
| [4] | https://pypi.python.org/pypi/cookiecutter/1.6.0 |
| [5] | https://www.vagrantup.com/intro/index.html |
| [6] | http://www.sphinx-doc.org/en/stable/man/sphinx-build.html |
| [7] | https://docs.python.org/2.7/library/simplehttpserver.html |
| [8] | http://yaml-multiline.info/ |
| [9] | http://www.yaml.org/spec/1.2/spec.html#id2796251 |
| [10] | (1, 2) https://docs.openstack.org/reno/latest/user/usage.html |
| [11] | https://docs.openstack.org/releasenotes/nova/unreleased.html |